Saturday, August 25, 2012

Shutter Pair, Funky Sunflower and Poppy


Hi Everyone!
Another weekend here already.   I said I would Tell you about my other two Shutters that I took to the Gallery a few weeks ago. They are the two you see here, (You would probably figure that one out on your own)..   I unloaded them and didn't even have the price on them or have them displayed.They were just leaning against the window, waiting to be placed when the nicest young couple came by and started admiring them.  I had my back to them because I was digging through my purse for the tags for them,(I'm sure showing my best side) I was going to go back out to the van to bring the rest of the items in, when they started asking the price and discussing where they were going to put them. I love it when people start oohing and ahhing about art! They bought both of them right on the spot, and it was so exciting to be there when they were purchased. I love meeting my customers, so that was a special treat for me.


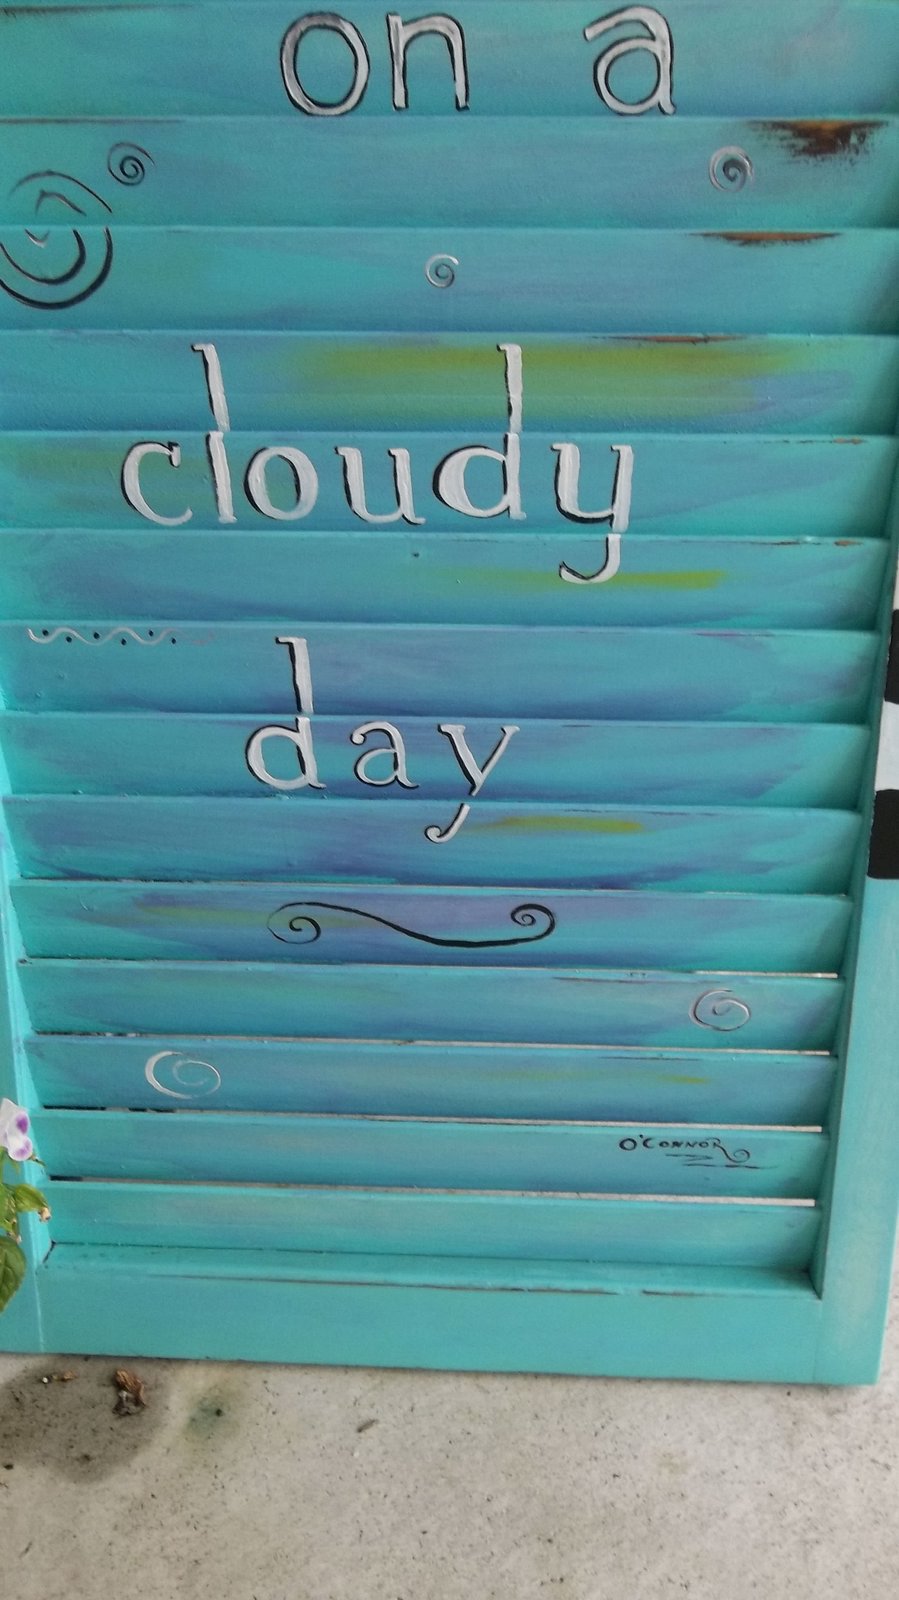
These were some shutters I had stored in my garage for at least 5 years.  I would walk by them every time I got out of the van, and think, I'm gonna paint a BIG flower on those...and then I would go in the house and forget about them. They were an ugly brown when I started. They are wood. The first thing I did was give them a good sanding. I didn't use primer on them because I wanted to use the chalk paint recipe by the way I got off of Pinterest. There are a few recipes out there, but this is what I used.

CHALK PAINT
1 cup paint Flat Latex paint, or you can use craft paint too.

1/3 cup hot water

1/3 cup Plaster of Paris
or Baking Soda

Mix the POP or BS with the hot water to form a smooth consistency before you add the paint. The finish I find is usually rather grainy, but it sands right down and is especially easy to work with if you are going for the distressed look because it sands off so easy. I did find though that it is very tough and durable, and was pleased with the adhesion.


This was my Funky Sunflower Shutter, and you can see some shading on the green if you look closely. I always like to shade it a little  with colors close to the base coat, but just a little darker or lighter. I probably used 3 shades of green to touch it up after I had sanded it lightly after the initial coat of paint. You can see a hint of red too. I like to barely touch green with red so that it streaks it just a little. 

And here is my Poppy. This was the first time I had done a Poppy, and it was fun to work on.
 

I like to doctor the stems up so they are not so traditional. I like striped stems! 
 

Of course, Sunflowers are always a favorite of mine. And again I like to make the stems interesting too. It was a little challenging painting on the slats but it worked. It just was harder to blend and do the shading. 

I put several coats of Polyurethane on this, but I used a spray since it would not be receiving heavy use like a lot of my funiture. I always apply it with a paint bursh when it is a piece that could see some use. It is much more durable than a spray. 

I really enjoyed working on these and should do another set. I have a set of cafe swinging doors, and one more tall shutter to work on . Any suggestions?

 If you like what you see, would you do me a favor and sign up to be a follower of my blog? That way you will receive updates in your email when I add new things. Thanks for stopping by. Ta ta for now! Carolyn
 

Sunday, July 29, 2012

Painted Shutter- "I've got Sunshine"

Hi all! I am in love with painting shutters! This is my latest project and I had so much fun doing it. Yes, it was challenging painting on louvers, but very doable. I tried to put a template on it to save time but it wouldn't transfer properly so in the end, it was just good ole eyeballing it and free handing the letters.


I started out with just a plain brown painted shutter, and I thought I had a picture for you but of course it is in my intricate filing system with a thousand other pictures!  So just imagine taking the shutter, cleaning all the spiders off it...'cause it was stored in the garage, and sanding it good so it was fairly smooth. The paint that was originally on the shutter was very rough and bubbly, so I wanted most of that smoothed out.   I used a mixture from Pinterest for homemade chalk paint and was actually pretty pleased with it's adhesion. This recipe will be very grainy when applied and has to be resanded, but actually it smooths out quickly with a good buffing. I paid special attention to areas I would want a worn look and distressed them through to the wood.


After I sanded it, I loved the color so much I set it on my porch behind some flowers for a little pop of color.   This resulted in some water discoloration . :( Booooo...   But it's one of those things, I knew it would discolor from the water,  but I just loved the color so much and was having company and wanted that bright pop of color and yada yada yada, so it was no surprise that I would need to retouch.  Kinda wanted to see how the chalk paint would hold up too.

The next step was to put it on a large easel which I LOVE (thank you Hubby dear!) and start retouching the paint where the water had discolored it, or I wanted the paint brightened just a little. I used plain craft art  paint from the craft store, the same color I had used for the base in my chalk paint. I did this, because I wanted the coverage but did not want to have to sand the chalk paint again, this paint would go on smooth.
The shadowing and paint difference you see is from a purple wash I made out of watered down paint,... very watered down... and started applying to the main center part of the shutter to give it some shading.

I started with my sun. Yep, just start painting a partial circle.

This what it looked like with some other shadings added to the sun, and the lettering was next.

For the font, I played around on the computer for some fonts I wanted together and then just started painting the "I've got" in my own writing because I couldn't decide what I wanted, ....what I wanted was just to start!!
 

After the first two words, were on..... I decided maybe I should look at the  font guidline...and follow it somewhat!  SO for the rest of the words I looked at my guide, but all in all I like the free spirited way it turned out. I outlined the letters but not on both sides, except for the  "on a" ....more of a shadow outline. If you outline them on both sides, they look more like baloon letters.  


It looked good on my porch but of course I took it to the gallery for my display.  I think I need to do one that is just for me though, don't cha think? I like the pop of color on that corner.

Any questions, just email me. Have you done any shutters? I would love to see them. Email me a picture at csoconnor1@gmail.com

By the way, I have had 2 more shutters that I also took to the gallery along with this one, and they sold (!!!)before I even got them in the display, but that's another story for my next post, so stay tuned.
Ta ta for now.
Carolyn

Friday, June 15, 2012

Redressing an old breadbox

Hi! It's the weekdnd!!! Yay!
Thought I would show you what you can do with something like this.
Have ya ever come across an old bread box and thought "Cool, but what would I do with it?  Well this hand made bread box was just screaming for me to save it. Some one had lovingly built this and that is one of the things that really draws me to a piece. One of a kind, I like it.  Sorry I am so poor at taking before pictures, but as I blog more, I will get better. Promise! 
I am so lucky I have ANY pictures of it that are decent because I was running out the door suitcase in hand to fly off to Alaska and forgot to take pictures when I dropped it off at the gallery! My sister Mary Ann was here, and took some pictures, ...and she reminded me that I needed to get pictures of it when I displayed it at the gallery...ppppffft   like I needed reminding, ha.....well of course I ran into the gallery and set it up on display and raced off to catch my plane...I remebered it about 20 mile down the road.  Thank you Mary for these pictures!


Here I am putting the final touches on it before I take it to the gallery
 
Dancing flowers...I love them and people start acting disappointed if I don't put them on a piece..


You can see the shelf inside peeking out before I put the front doors on, it is green with aqua polka dots.


This was a fun piece to work on ( I know, I say that about everything I work on, don't I??)

Hope you've gotten some ideas for some fun projects of your own. I'd love to see them if you want to share. Just email them to me at csoconnor1@gmail.com
Have a wonderful Fathers day!  Tata for now, Carolyn
Posted by Picasa

Thursday, June 14, 2012

A Trash bin too pretty for trash


Cheers everybody! It's a wonderful day in the studio and I wanted to share a recent project. This is a trash bin I found at a garage sale for 5 bucks!!  For several years it sat in the garage by the door, holding huge bags of dog food for our little Pollydog. Honestly, I don't know how much I thought she was going to eat....but I bought it in 20 pound bags and I would store them in this. Anyway, every time I walked by it to go into the house, I would say  "I should paint that".  Well, I finally did~!


As you see it here, I have sanded it and am ready to put a coat of primer on it.  I have wiped it good with a tack cloth to remove any sanding dust. 

I find it easier to paint if I take it all apart. That way, I get to waste a day looking for the hinges when I am ready to put it back together. I swear I always put them in a place that would be the first place I think I would look for them, but it always turns out that, it is the ...always... the last place....   And sometimes I don't find them until after I replaced them with new hinges that will fit the indentations and holes.....not an easy task because the new hinges are not shaped the same. This is important, because if I were going to replace them from the start I would sand any indentations and fill the holes when I was prepping the piece.


You can see it does not have a back on it and I knew I wanted one. (No, I didn't just take it off...)

I was planning on bead board, but then I decided to just go with plywood. So I bought a piece of quarter inch plywood and painted the background green.  Then I put a big heart on it. I had just gotten some Copic permanent markers (thank you sister Mary for chipping in!) and I used them for the final little sprigs out the top, sides and bottom. I was so excited that it was much easier then doing them with the brush and having to have the brush loaded just right with the right consistency of paint blah blah blah..... so here is how it turned out.
Copic markers are alcohol based and "permanent"...
..water proof..
BUT NOT POLYURETHANE PROOF!! :(

I had tested it on a small patch and it looked great... but when I applied the polyurethane it started bleeding and smearing!!! Oh NO!!!!  
So I did what anyone would do. I immediately spit on paper towel and started trying to clean the lines up !  Hey, you use what is handy and all the water in my containers were full of paint water from swishing paint out of the  brushes. I couldn't let it start drying for over 30 seconds and it worked.  Whew!
  I was able to clean the lines up enough that the smearing was not noticeable, and then I retraced the lines with a paint pen.  OK, now on to the next step...

Oh, here's a tip, I would have been fine with the copic markers IF instead of brushing the Poly on, I would have first sprayed a light coat of poly on, and that would have sealed it so that I could then brush the poly on without worrying about it bleeding.  When ever I am doing black and white I do that if the paint has not dried  for several days........but I was in a hurry.... Hmmmm I vaguely remember "Haste makes waste.."


I decided on some flowers for the front, and again used the copic pens on the bottom of the flowers forpart of  the ground, but the smearing on it was fine and actually added to the blending of the earth look so no heart attack there.

 This is how the cabinet looked when I was done, and everyone was impressed that I had been able to paint the heart on the inside......when I actually painted it first, and then attached it after the fact!  The green background looks yellow but it is actually green.  My friend Jenna took these pictures in her kitchen because I stopped by her house on the way to the gallery (where I was going to drop this off) and attached the  "heart back" to the cabinet. Thank you Jenna! If you wouldn't have taken these pictures, I would not have any to post because it sold within the week~


Here's a close up of the drawer, I like to make the polka dots different sizes so I purposely make some of them larger every so often..
This picture of the handle is bad I know but you get the idea. I put together two strands of beads with wire and then wrapped colored  wire around them for the handle on the drawer.

OK, guess that is all the damage I can do for the day here, guess I will go paint!
Ta Ta for now, Carolyn 
Posted by Picasa

Tuesday, May 22, 2012

Grand kids' Murals

Hi everyone, I just got back from Alaska, and  thought I would show you something a little different than painted furniture today. I was recently in Anchorage visiting my grandkids, and I painted some murals on the walls. I had so much fun doing it, and the kids really liked them. I was really surprised at how much attention the "not quite 2 year-old" paid to them. She was really excited about them.


These  pictures are part of the mural on Ellie's wall. When the room was Levi's room and he was a baby, I had painted the room two toned, with the vine around the room and with a large tree to the ceiling off to the left of this grouping.

Below was the starting of the Mural for Levi's room when he was a baby, and it is now Ellies room with the addition of flowers and butterflies. We decided to girlie it up a little when Ellie moved into it.


This was 2 years ago, and sadly I cannot for the life of me find a totally finished tree and Monkey for you to look at,..I am so bad about forgetting take pictures. Since it is 3,230 miles away, I can't just run over there to take another picture. I know I have some somewhere but I think they are on an old phone ..which I probably have in my intricate filing system... because I keep everything.... but you get the idea.
 Just close your eyes, now imagine the tree with more leaves and the monkey with a face. Good Job!


Now two years later, the room has morphed into a girlie room for Ellie.


 As I was drawing the dinosaurs that you see below, (and erasing!!) I mentioned  to my son that a friend of mine (Marie Kantarzis)had told me she used to work with large scale canvases, and she would draw a small drawing and then project it on the canvas. "Would a projector help?" he asked. I jokingly said,  " why, you don't have one laying around somewhere do you?"....."Yeh, out in the shop"...... Wow,  did  I get excited! It worked great, so much faster.  If I had been at home, I would have drawn it out on paper and transferred it (easier to erase on paper than on the wall)  I projected the sunflower, and the dinosaurs on the walls and it saved me a lot of time (and erasers)  So much easier! When Shane (my son) saw how well the projector worked in the rooms, he told me to take it home with me!! Whoo hoo! I was one happy camper. Thank you Shane and Amie!

 If you have any questions about how to transfer a picture, leave me a message below,
or email me at csoconnor1@aol.com


This was my first  picture, and I got so excited about projecting the dinosaur that I had a large part of him painted before I realized I hadn't done the background! Note to self..... it is easier to do the background first rather than paint around your subject later!


Levi is 3, almost 4, and he was so excited to pick out the dinosaurs he wanted. He knew exactly what kind he wanted. I on the other hand thought there were about 4 kinds......Learned a lot from a 3 year old that day. I now know what a T-rex is and that it eats plants. :)  ...uh oh ... already forgot what the other one is called...sorry, Levi....I guess you are gonna have to review it again with me.  (Now I know how the little ones forget what I tell them....and I thought they were faking.)


Levi, before I was totally finished with the dinosaurs in his new room, acting silly..or should I say normal, because he is such a little ham that most of my pictures have him making funny faces. He kept walking around his room while I was working on it saying "I'm so happy, Grandma, I'm just so happy!" and "I love my T-Rex" . Always nice when the client is satisfied, right?


Ellie, saying "coot, coot" because her Dad had walked in the room and said "Cute" while I was working on it. If I left the room for a break, Ellie would race down the hall to her room shouting  "coot coot!" Gotta tell you, this granny got a work out tryng to catch her before she got to the paints and brushes and worked a little of her own magic on the walls too. I had a blast with the kids. One day, I even painted tried to paint in the room while I was babysitting  them .....most of the time I felt like a goalie at a hockey game protecting the wet paint from Ellie! Talk about a kid stoned on life.

But look at that face, I think she liked it, what do you think??!
Makes me smile just remembering.
Thanks for letting me share. That's all for now, time to hit the hay. Oh crap, it's morning already! Well Time really does fly when you're having fun. I started this at 1:30am and it is now 6 am. Gonna be a reeeeeeally short night....
Carolyn